I originally posted this entry on our family’s Wordpress blog, back in 2015. I decided to update and repost the content here, since
it’s still relevant andit fits better here anyway…
miniLock is no longer actively maintained and is no longer recommended as an encrypton option.
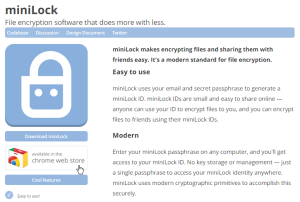
There are lots of different ways to encrypt a file and today I want to cover one of the more obscure, and I believe more unique methods.
miniLock is was a Chrome app and relies on the combination of an email address and a strong passphrase as the key. This is both a positive and a negative.
That’s great because it means you can encrypt and decrypt files on a Chromebook, or any other machine without storing the private key locally. It’s bad because most people don’t have good passwords – much less passphrases.
Still, it’s a simple way to encrypt files, and I like to have options.
At the risk of making the process more complicated than it really is, I took some screenshots and walked through the installation and encryption process below.
Installation
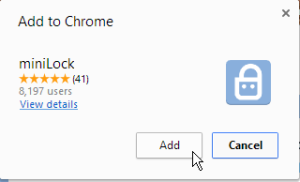
Step 1: Install
Installation is super simple. Visit minilock.io and click the link to the Chrome App Store
Click “Add to Chrome”
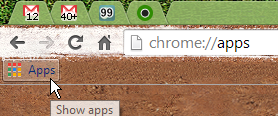
Step 2: Launch
Go to the installed Apps in Chrome and click on the light blue padlock
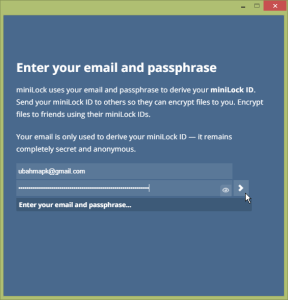
Step 3: Create key
This is done by entering your email address and a strong passphrase.
Encryption
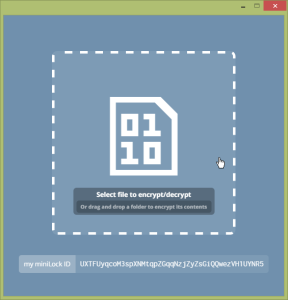
Step 4: Select file
Your miniLock ID is shown at the bottom of this window. This key can be posted or sent anywhere – and should be if you want others to be able to send you encrypted files with miniLock. I currently have even had my ID in my Twitter bio line - and in fact, the entire key ID fits in a single tweet.
My miniLock ID is UXTFUyqcoM3spXNMtqpZGqqNzjZyZsGiQQwezVH1UYNR5.
Now you can either drag the file you want to encrypt, or click the big square box to find your file.
Step 5: Encrypt
Paste in the miniLock IDs of the file recipients. I strongly recommend keeping these in a text file or email or Evernote or something similar. Again, they are not sensitive, so it really doesn’t matter where you keep them. A file in Dropbox would work just fine. :-)
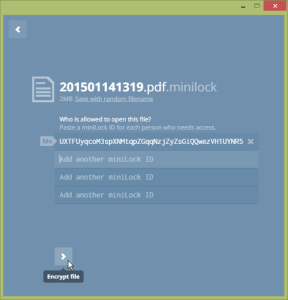
You can add more miniLock IDs if you need to.
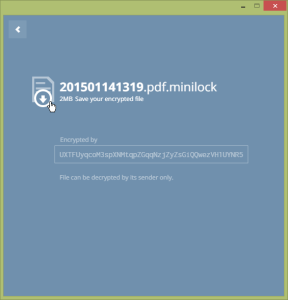
Step 7: Save encrypted file
Once complete, you can download the encrypted file by clicking on the down arrow. This “.minilock” file can be attached to an email or sent via Dropbox or put on a USB stick or stored and distributed anywhere, really.
Decryption
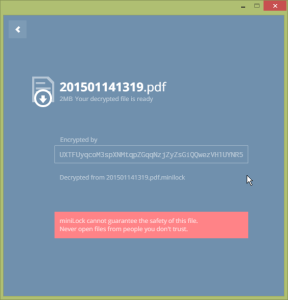
Decrypting a “.minilock” file is just as easy. Simply drag and drop the file onto the window from Step 4. The file will decrypt (assuming it was encrypted to your miniLock ID) and you can download and save the original file.
Conclusion
That’s really all there is to it.
I believe the greatest weakness and strength of the entire miniLock system is the keys. (Of course, that should be said of any good encryption system - and this solution hasn’t been elevated to that status yet.)
It’s a strength because the private key isn’t stored anywhere - it’s generated by the login process. It’s a weakness because there isn’t a good way to store the keys for others. Which means key distribution with miniLock has the same problem as PGP. Except there isn’t a way to sign the keys of others, so there’s no good way to establish trust, making the miniLock less ideal than PGP.
I still prefer PGP (or GnuPG) for encryption, but it’s good to have alternatives to work with. So I consider this just another option.